DoublShot captures are just the starting point. After taking a screenshot, you can refine it in three steps: beautify, crop, and annotate.
Open any screenshot from your recent captures, or drag any image into DoublShot to start editing.
Step 1: Beautify
Apply styling to make your screenshot look polished.
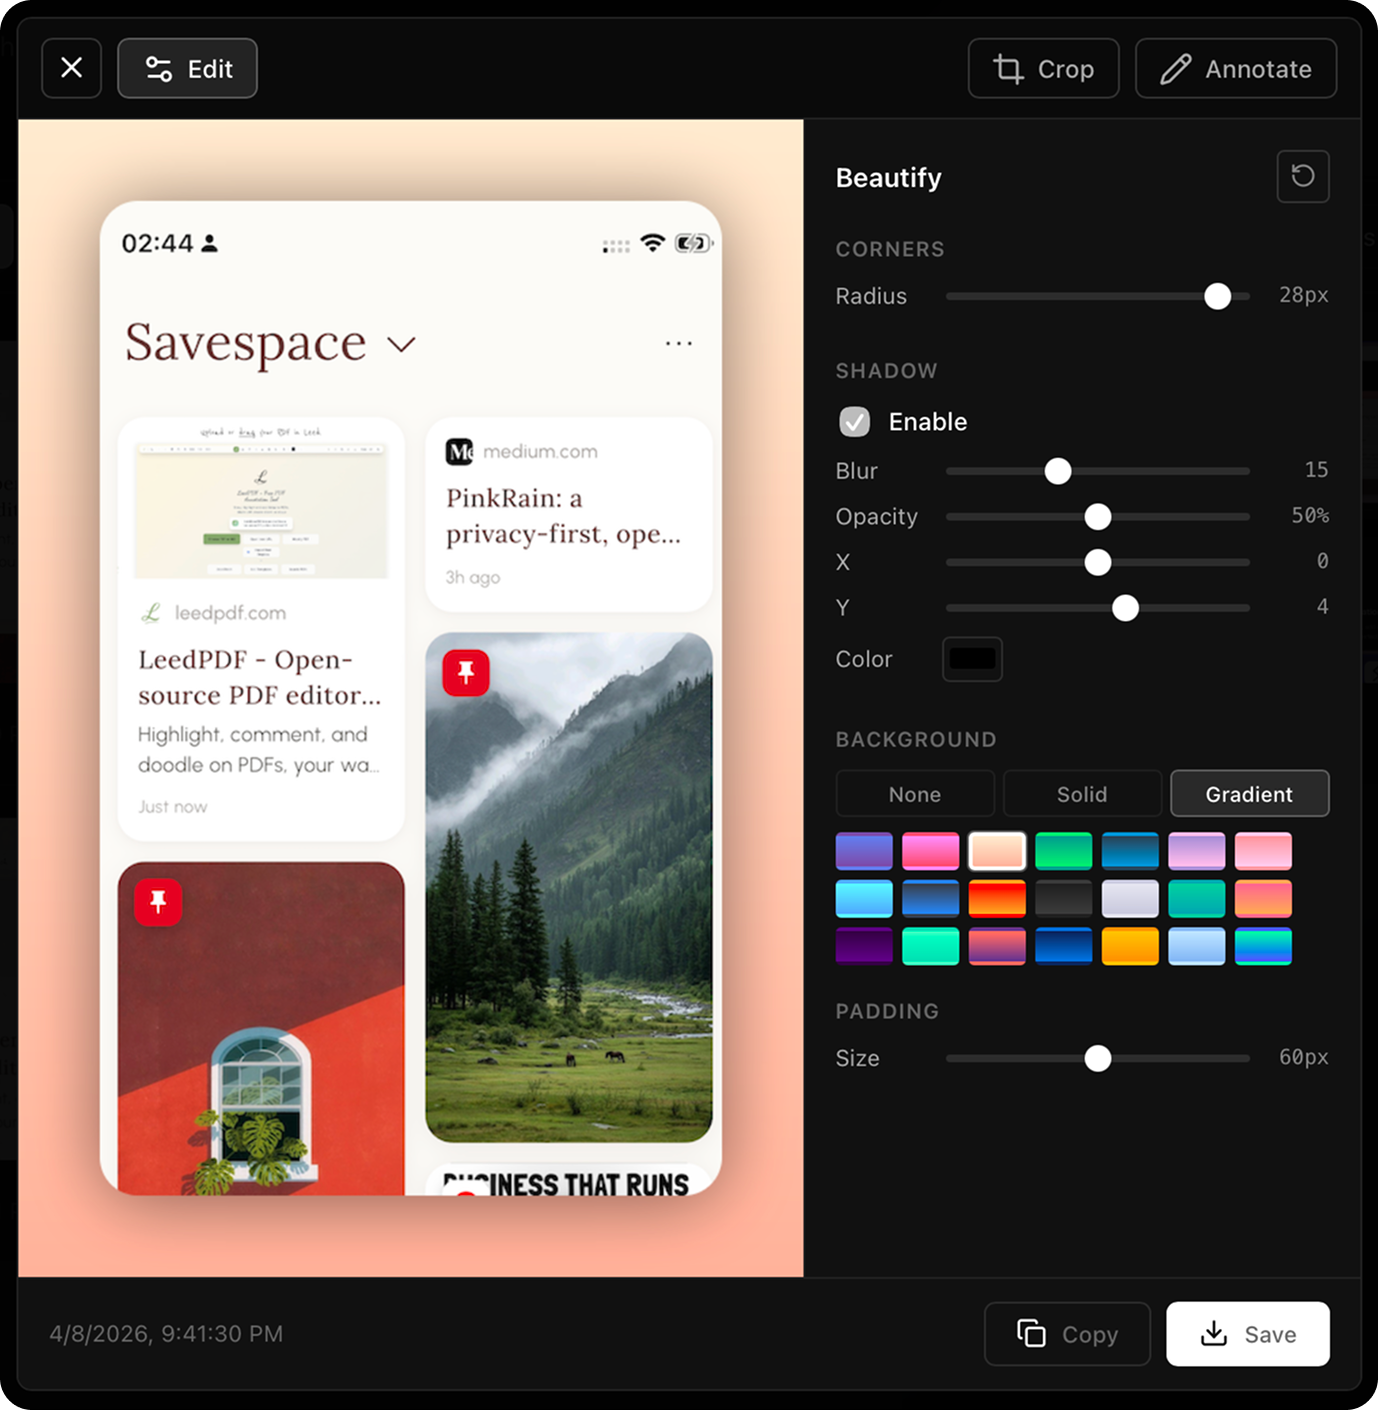
Adjust the frame:
- Padding — Add space around your content for breathing room.
- Shadow — Add depth with adjustable drop shadows.
- Corner radius — Round corners from sharp to fully circular.
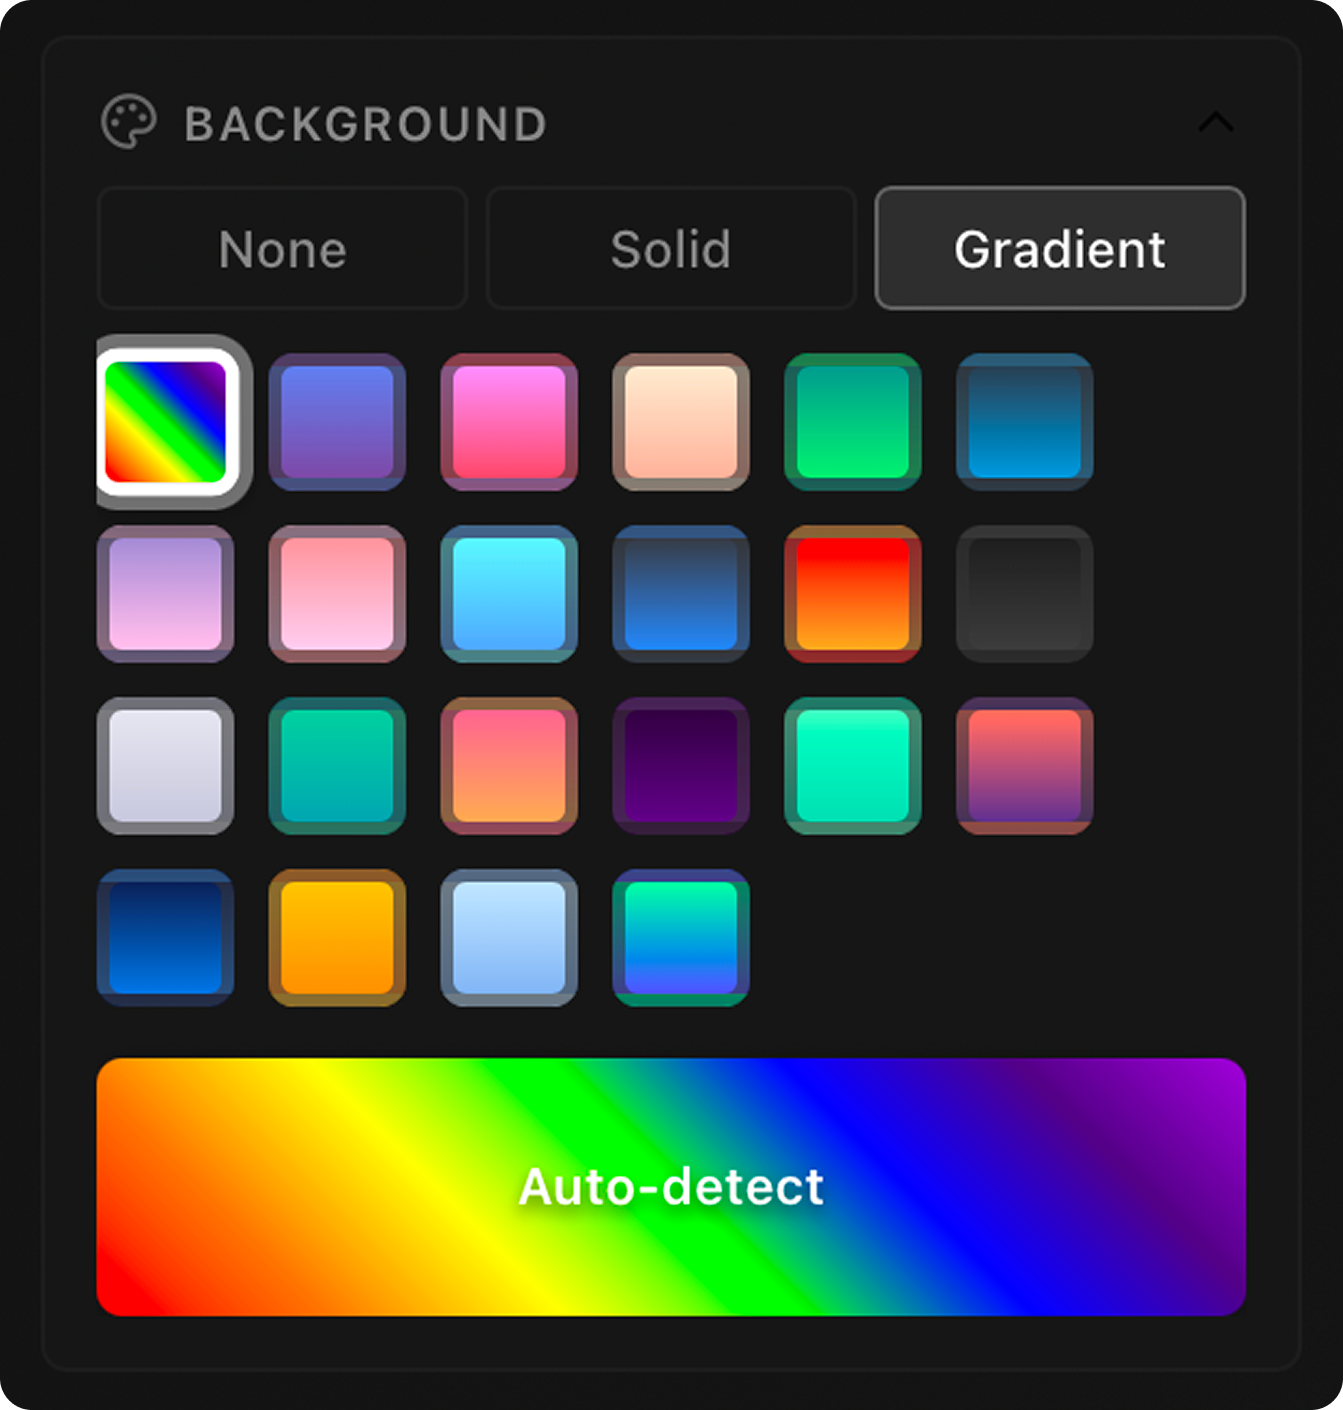
Set the background:
- Solid colors — Clean, consistent backdrop.
- Gradients — Add visual interest with linear or radial gradients.
- Auto-gradient — Let DoublShot pick a gradient based on your screenshot colors.
Step 2: Crop
Focus on what matters by removing unnecessary parts of your screenshot.
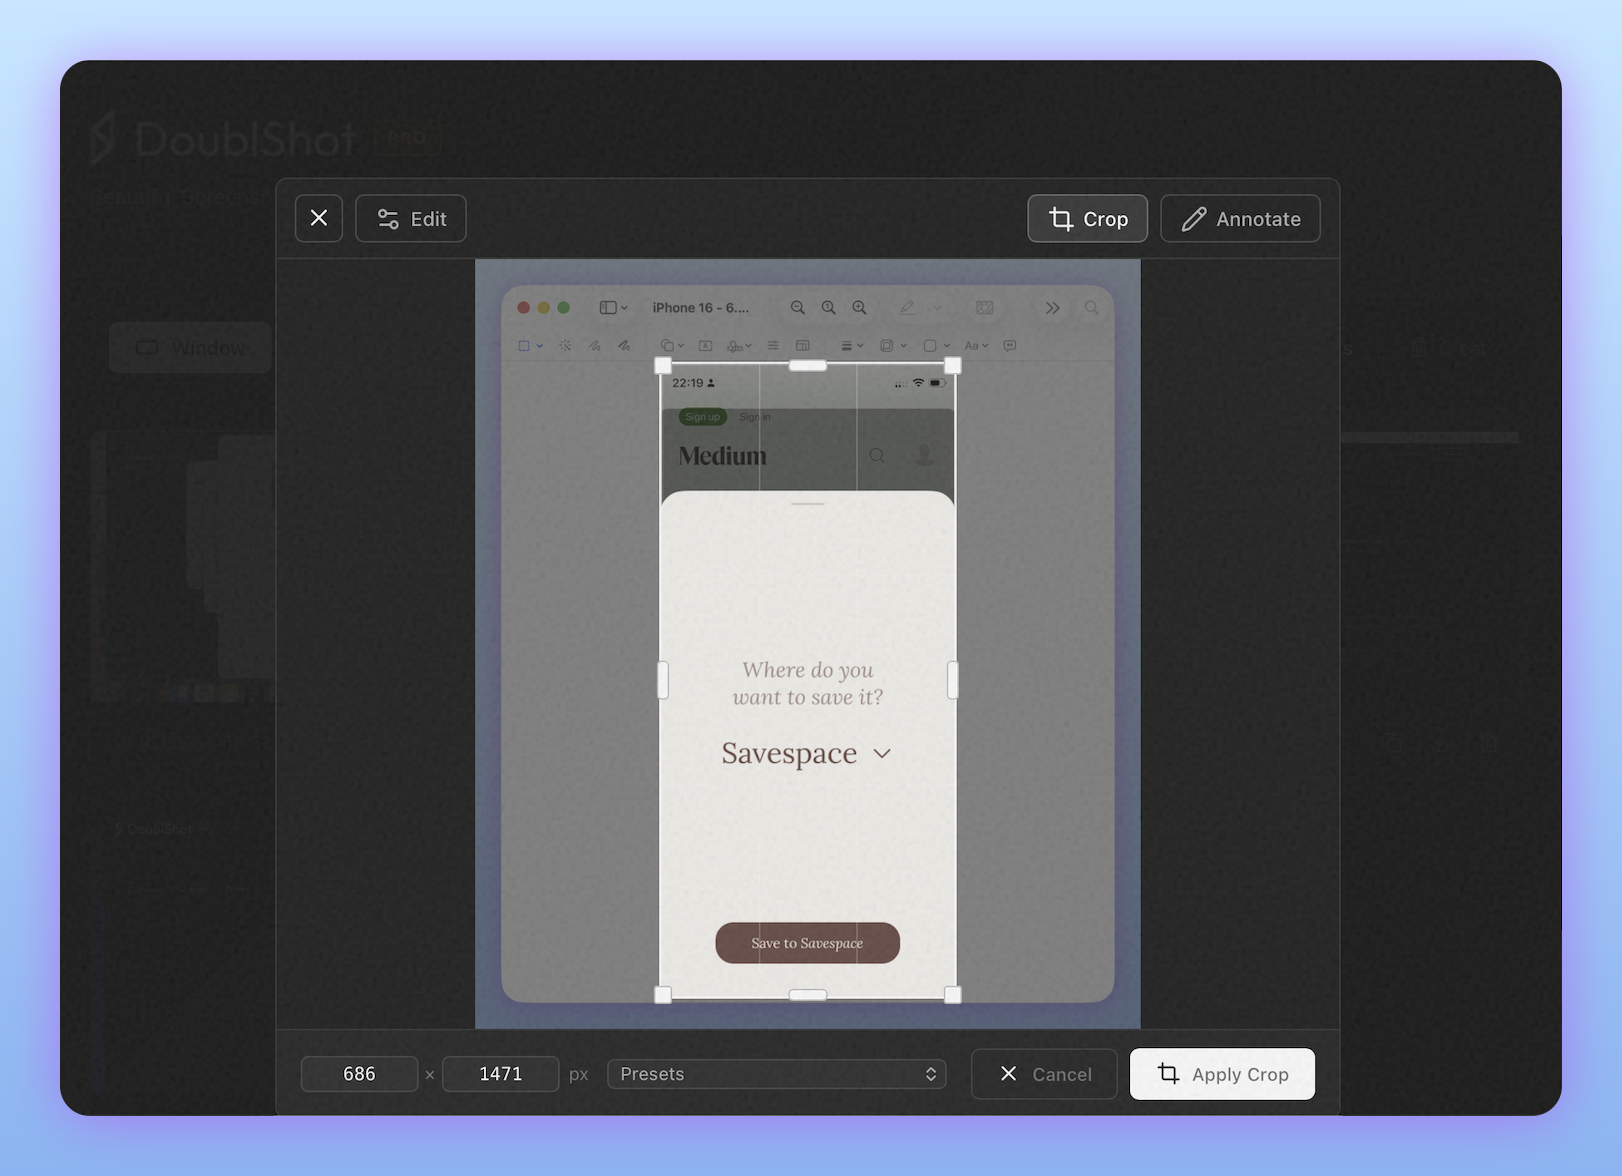
- Select the crop tool.
- Drag to adjust the selection area.
- Press
Enteror click apply to confirm.
Use cropping to remove sensitive information, highlight a specific UI element, or improve the composition before sharing.
Step 3: Annotate
Add context and draw attention to key details.
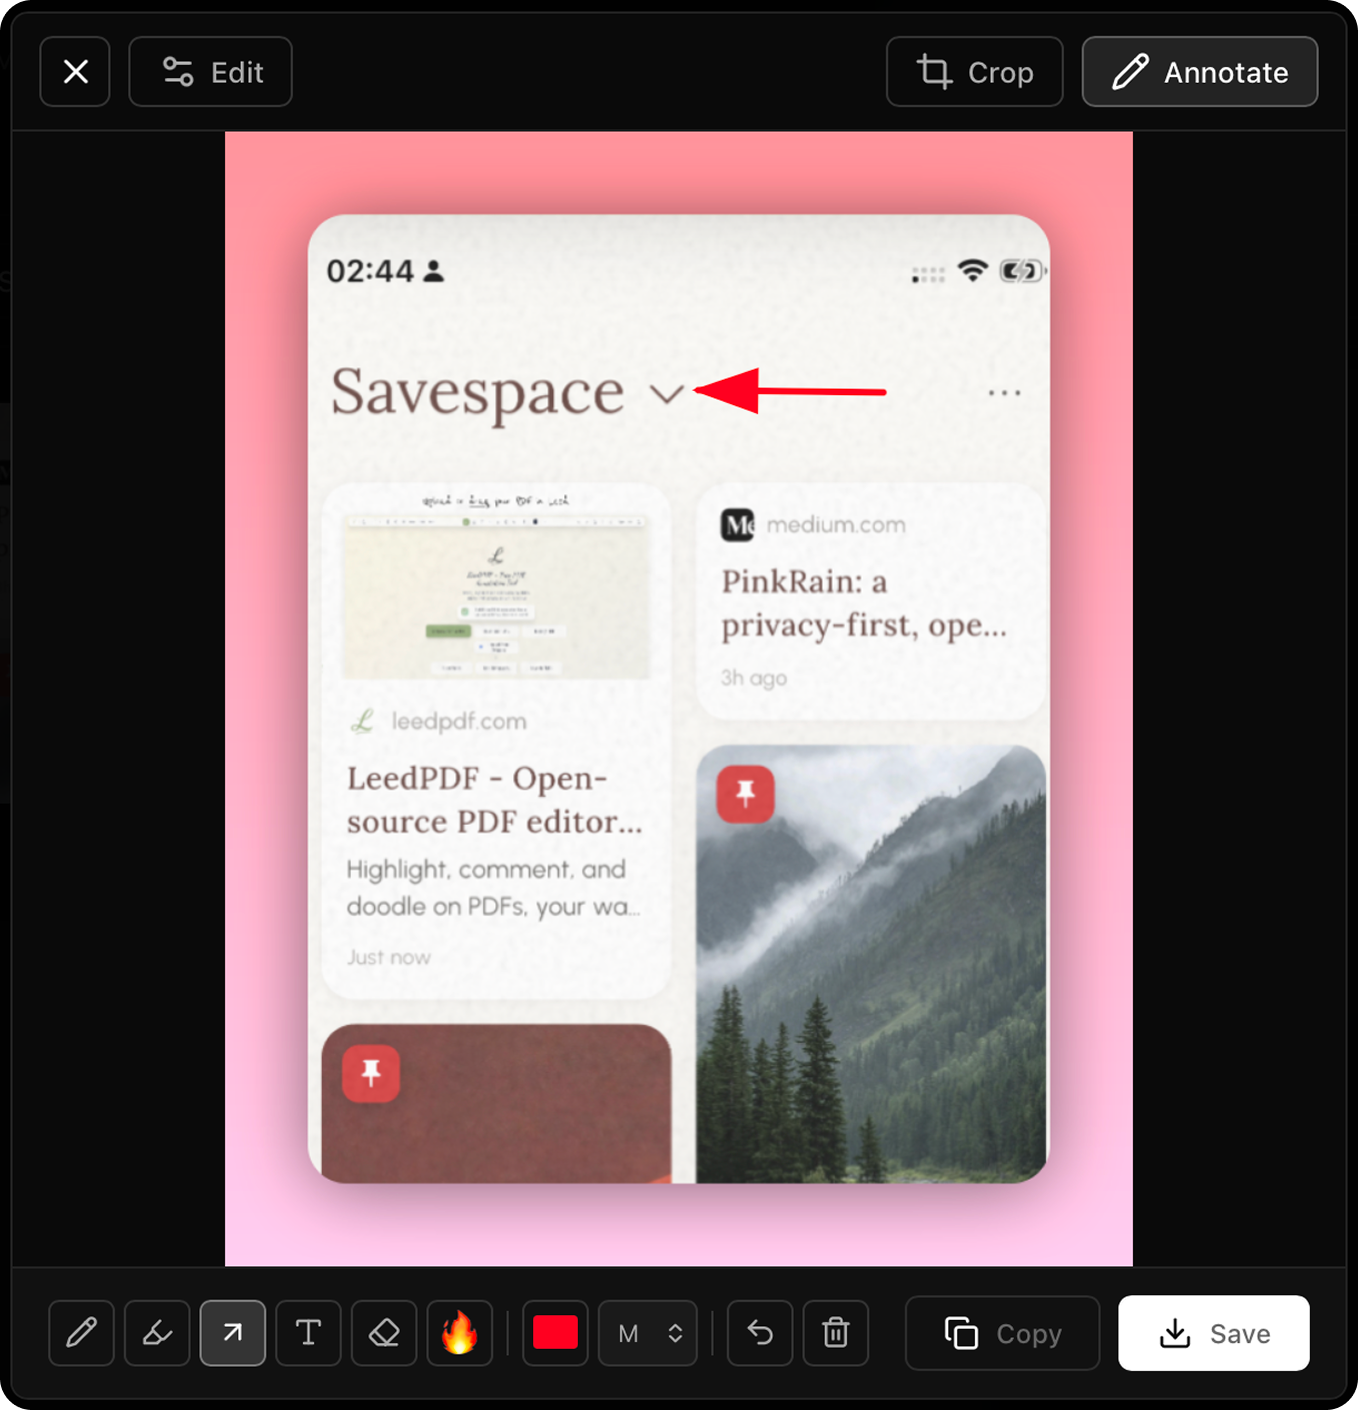
Available tools:
- Arrow — Point directly at specific elements.
- Rectangle — Highlight areas or draw boxes around key elements.
- Text — Add labels, instructions, or context.
- Pen — Freehand drawing for custom marks.
Adjust color and size to match your style. Annotations sit on top of your beautified screenshot, keeping the polished look while adding clarity.
Copy or save
Once your screenshot looks right, click Copy to save it to your clipboard, or Save to download as PNG.
What to learn next
Now that you can refine screenshots, explore how presets can automate your styling:
Get Started Get started with DoublShot Learn the complete workflow from capture to polished screenshot in minutes.